
Microsoft 365 setup
Liscaragh Migrate signs in to Microsoft 365 as its own app registration, using a certificate rather than a password. A built-in wizard sets this up for you: one admin sign-in, and the app registration, certificate, permissions and admin consent are all handled automatically.
1. Open the wizard
In Liscaragh Migrate, open Settings > Setup checklist. Find Microsoft 365 in the list and click Set up.... This opens the Microsoft 365 setup window, which explains what it is about to do, then click Sign in and set up.
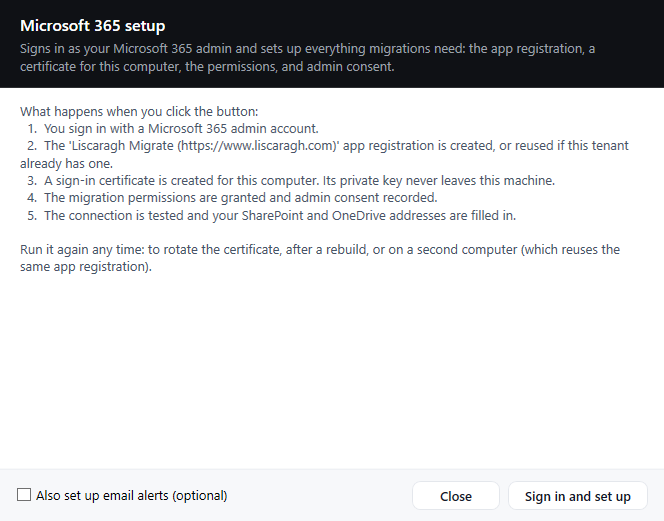
What the wizard shows before you sign in to anything.
2. Sign in
A sign-in prompt appears. By default this is a device code sign-in: the tool shows a short code, you visit microsoft.com/devicelogin in any browser (on this computer or another device) and enter it there. A full browser sign-in window is also available as an alternative if your setup supports it.
Sign in with your Global Administrator account. The account is asked to approve three permissions for this setup only: Application.ReadWrite.All (create or find the app registration and add this computer's certificate to it), AppRoleAssignment.ReadWrite.All (record admin consent for the migration permissions) and Organization.Read.All (read your tenant name and verified domains). These are used once, for setup, and are separate from the permissions the migration itself runs with afterwards.
3. What the wizard does automatically
From that one sign-in, the wizard:
- Finds the app registration for this tenant if one already exists, or creates it if this is the first machine to set it up.
- Generates a sign-in certificate for this computer. The private key is created non-exportable, directly in this Windows user's certificate store, and never leaves the machine; there is no
.pfxfile at any point. Only the certificate's public key is uploaded to the app registration. - Grants admin consent for the five Microsoft Graph permissions the migration needs (below), without opening a separate browser consent page.
- Tests the connection and fills in your SharePoint and OneDrive web addresses automatically.
4. Permissions granted
The wizard grants the app these five Microsoft Graph application permissions, with admin consent recorded automatically as part of the sign-in above:
- Sites.ReadWrite.All – read and write items in all site collections. This is how the tool creates folders and uploads files into SharePoint libraries, and how it reads or searches your sites while you choose a destination.
- Files.ReadWrite.All – read and write files in all site collections. This is how it writes into OneDrive drives and document libraries.
- User.Read.All – read all users' profiles, so the tool can find a person's OneDrive from their email address when a project is migrated to their account.
- Domain.Read.All and Organization.Read.All – read your organisation and its verified domains. The wizard uses these itself to detect and fill in your SharePoint and OneDrive addresses at the end of setup.
Sites.Selected model can restrict the app to named sites, but it has to be granted per site, outside the wizard, and is more involved to run. Start with the wizard unless you have a specific reason not to.5. Email alerts (optional)
The setup window has a checkbox to also set up completion email alerts. Ticking it grants one further permission, Mail.Send, and creates a shared mailbox in your tenant to send from, which needs a separate Exchange Online admin sign-in. Leave it unticked to do only the core Microsoft 365 setup, with a single sign-in and no Exchange step; you can set up email alerts later from the same wizard, or from Settings, without repeating anything already done.
Prefer to do it by hand?
If you would rather set up the app registration yourself, or have been handed a certificate by an IT contact, Settings > API settings still takes the Tenant ID, App (Client) ID and a .pfx certificate directly, with an Auto-detect URLs button to fill in your SharePoint and OneDrive addresses once those are entered. This manual route is unchanged and works alongside the wizard; use whichever suits how your tenant is administered.
That is the Microsoft 365 side done. If you migrate from Datto Workplace, set that up next with the Datto Workplace API setup. To start migrating, see the main how-to guide.